Agriculture is an essential part of keeping humans alive. In a purely natural environment, plants will grow & die. When plants die, their nutrients replenish the soil for the next round of plants. We disrupt this cycle when we consume the harvest. Since we are the ones exhausting the soil, I believe it is our duty to contribute towards replenishing our soil. Our grandchildren should be able to enjoy the same bountiful harvests from fertile soil as we have. My way of doing that is not your average composting approach...its using worms & worm castings.
Today, I want to go into depth with you about the fun part, The part we work towards for months. The Fertilizer Harvest!
Here are the most popular questions I receive pertaining to harvesting:
- When are my castings ready to use?
- How do I sift my castings?
- How do I use my castings?
- How do I store my castings?
Did you know: One handful of worm castings can have more microorganisms than there are people on the planet?
When Are My Castings Ready?
As a worm farmer sometimes I feel like the kid in the back seat perpetually asking, "Are we there yet Dad?" As with all good things, it takes patience & time. Some of the determining factors of time are:
- What size is the worm bin?
- What type of bin are you using? (Continuous Flow Bin, Bulk Bin, etc.)
- How many worms are you starting with?
- What type of worms are you using?
- What environmental conditions can you maintain?
I'm not sure anyone can tell you exactly how long it will take given those variables. Technically speaking, as soon as you put worms in a bin with food, there will be castings as they poop! This is immediate, from day one! So the question is, when is the ratio of castings to bedding optimal for harvesting?
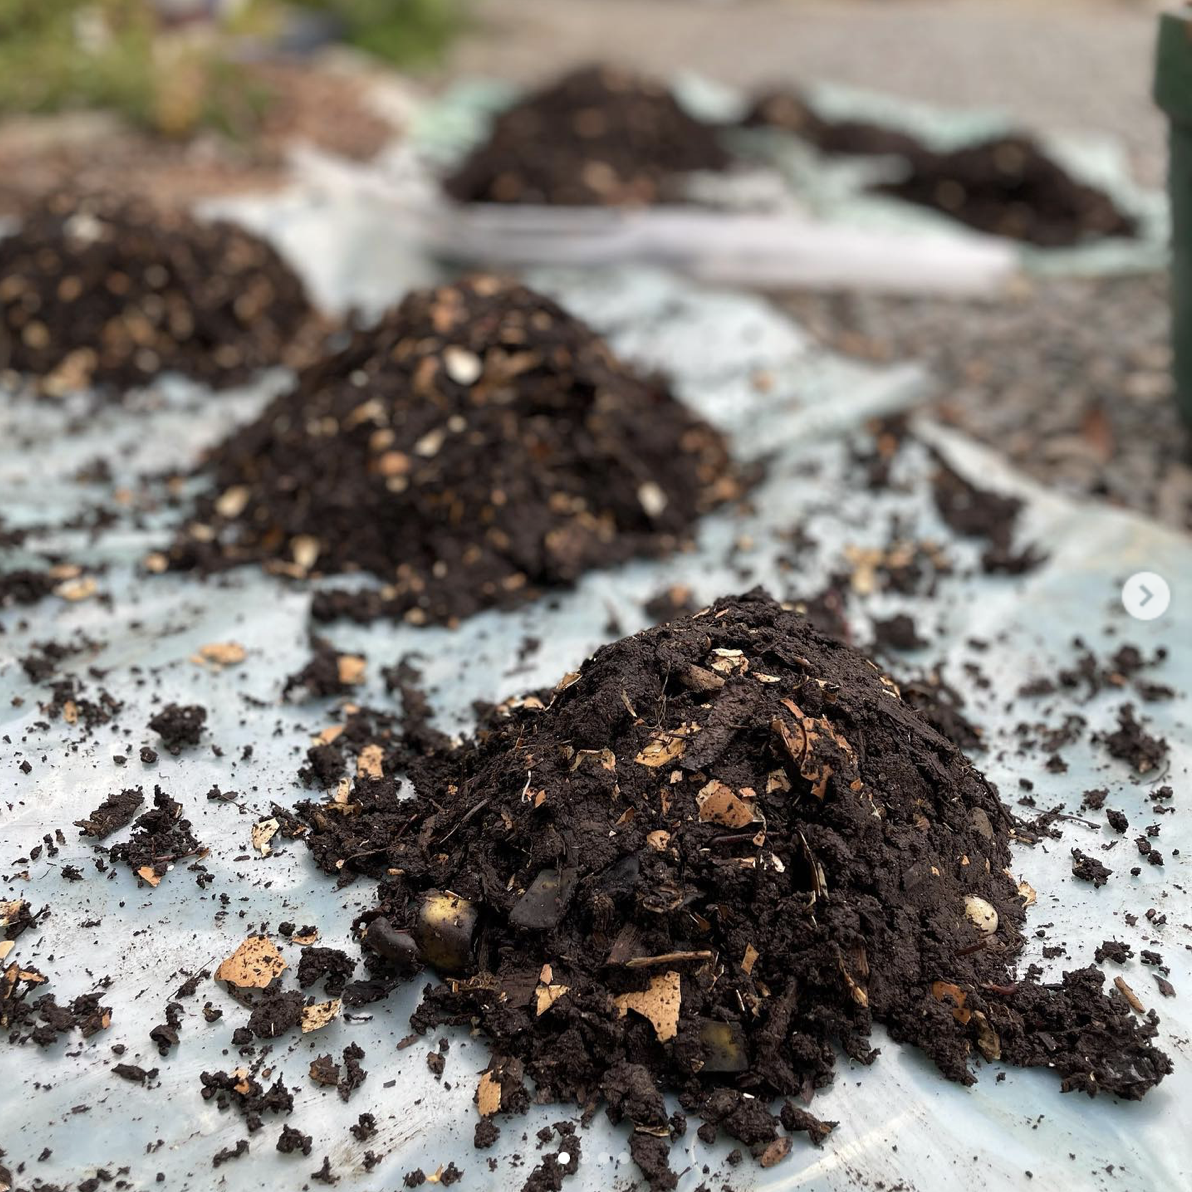
For the sake of explanation I will use my 1 ton bag bin as an example. In these bag bins I will harvest the castings in 6 months. Here is my setup & process:
Bin dimensions - 3'wide x 3' long x 3' high = 27 cubic feet (202 Gallons)
Bin Type - Bulk Bin
Amount of Worms - 6,000 to start
(I estimate there will be over 20,000 at completion due to them reproducing)
Type of Worms - Red Wigglers
Environmental conditions - Interior conditioned garage approx. 65 degrees F
My process starts with adding 10 gallons of bedding (pre-sifted leaf compost & wood chips) I add 6,000 mature red wigglers & I will feed these worms every day a combination of worm chow, pureed vegtable scraps & wheat grass pads.
Two times a week I will add 5 gallons of fresh bedding. This will slowly build the bins height, and the worms will continually be consuming the food and the bedding as they move closer to the top of the bin. It will take approx. 20 weeks to fill this bag to the top, and then I will give it about another 4 or so weeks to mature. At this point I am confident that my bin has reached its microbial peak and is completely ready to harvest.
In smaller bins it is likely the castings could be harvested much sooner, if you provide a good amount of worms and maintain the right conditions. Maybe the ultimate goal here is to maximize how fast the worms consume. In order to do that I would:
- Break down the bedding and food as small as possible for easy consumption
- Maintain appropriate temperatures
- Maintain adequate moisture.

How Do I sift My Castings?
When your worm bin is mature, the very next thing that needs to be done is for you to separate the worms from the bedding. This can be done a few different ways:
- Attracting them with food
- Relocate them using light
- Screening (by hand or mechanically)
Because my 1 ton bag bins are a finished product, Emptying them would be just creating additional unnecessary labor. So when they are filled to the top, I will attract the worms by placing a very sweet food source like scraps of watermelon to the top of the bin. I remove the piece of watermelon the next day when it has attracted a good amount of the worms, and replace it with a fresh one. I will continue this method for about a week or so until I am confident the majority of worms have been relocated. There may be a few worms left at the end... but that's ok by me.
If you have smaller tote sized bins, relocating them by using light could be a good option for you. Start by gently dumping out the contents of your bin onto a flat surface. In a few minutes the worms will burrow deeper into the pile to escape the light. At that point, scrape away the top and sides of the pile and they should be free of worms. Repeat this process until you have a pile of worms that are ready to be relocated.
"Nature does not hurry, yet everything is accomplished" - Lao Tzu
Larger operations tend to use a mechanical screening process to separate the worms and screen the material in a fast efficient way. I use the "Brockwood Sifter" simply because it is a quality made product that fits the size of my operation. Another option is a Trommel system - which could be homemade or purchased.
One thing to remember is there is no such thing as "Pure Worm Castings" If you have let your worm bin mature and have removed the worms and larger material, the rest can be classified as "Worm Castings or Vermicompost." In fact it is not even necessary to do any sifting of the castings after removing your worms if it is for your own use. The purpose of sifting is mainly to separate any larger bits of undigested material left uneaten by the worms, so that it is a very sellable product.
How Do I Use My Castings?
Castings are typically used in 2 primary ways:
- Planting & Transplanting
- Mid-Season Fertilizing
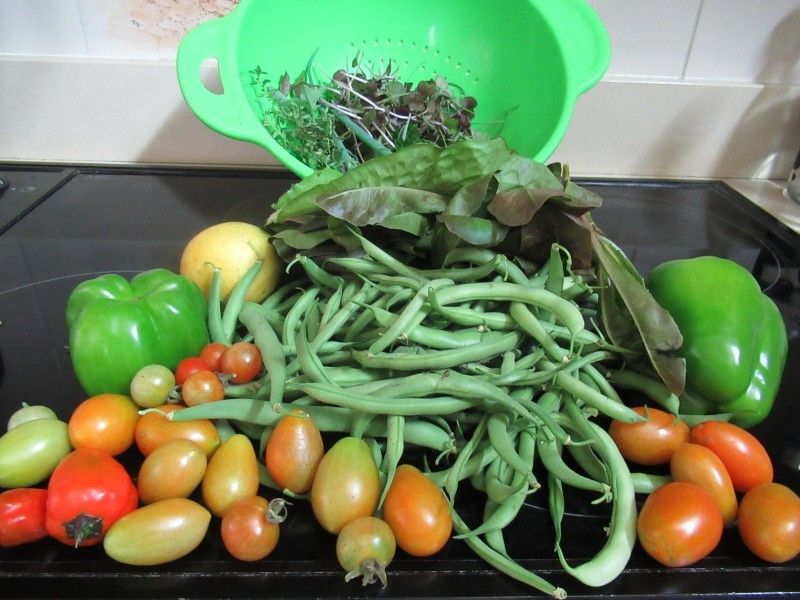
It is very important to use a sufficient amount of castings if you want to see the best results in your garden. Unlike other fertilizers, Worm castings cannot be overused or "burn" your plants. The more the merrier when it comes to castings.
My raised beds are each approximately 50 sqft. At the beginning of the year I will lightly cover the bed with approximately 1 1/2 gallons of castings, lightly raking into the soil. I will then dig a hole 3 times the size of the potted plant or seedling and fill the hole 1/3 of the way with only castings. I will then place the plant on top of the castings and fill the remainder of the hole with a mixture of garden soil and castings. As soon as I am finished planting a bed, I make sure it gets a good soaking.
In upstate NY, our mid season is July. I work another 1 1/2 gallons of castings into the top layer of soil in each of my 50 sqft beds to ensure my plants have all the nutrition they need to thrive.
Rule of Thumb: 1 gallon of castings serves 10 sqft of my garden throughout a season.
How I Store My Castings
The best way to store your castings is to not store them and instead use them as soon as possible. Although I am half joking with that statement, we need to remember that castings are a living thing. The real benefit to the castings besides the bio-chemical & mineral content is the microbial life. Because of this, they must be stored in a way that allows oxygen and retains moisture. One way to do this would be to keep them in your bin or a similar setup until you are ready to use them, while continueing to monitor moisture levels.
If you are selling your castings, think about the packaging and how long it will be until the customer will actually use it. Try to minimize the amount of time they are "packaged" so that the microbial life is still abundant when it is used.
In Summary
I think the idea of worms and vermicompost is an answer to a paradox in our marketplaces.
On one hand we want convenience and store shelves loaded with food and produce, so we can easily feed our families. On the other hand we know we have a sustainability problem. We are consuming all the nutrients from our soil, and trying to replenish them with chemical fertilizer that eventually disrupts ecosystems. All while telling ourselves its ok because it is economical to do so today.
There are big challenges ahead with the fertilizer industry on a global scale. Challenges that will require more technology & innovation in order for the everyday person to take part in the change. These challenges require active discussion on the topic. Figuring out simply "What Is Possible?" is a major step in the right direction, and will spark innovation when shared with everyone.
I believe this is possible: "We can supply all the fertilizer the world needs in a natural and organic way by harnessing the sustainability and power of the simple worm."
Our next step is sharing this knowledge with everyone. Let's be givers first without any assumption of return. When it's time to harvest your castings, I want to challenge you Worm People to use this opportunity to give some to a friend or a neighbor that hasn't heard of worm castings before. Let them experience first hand what they can grow in their garden without any synthetic chemicals.
Worms and the incredible fertilizer they create are bringing people together that don't normally go together. This is a powerful sign of community. And through this community, innovation will happen, which in turn will create prosperity & longevity for all of us.
Have a wonderful worm week!